Connect HaloPSA to Cobotic
Cobotic runs 20+ AI workflows on every ticket in your HaloPSA. Connecting takes about 15 minutes and needs a Halo administrator.
1. Create the Cobotic user
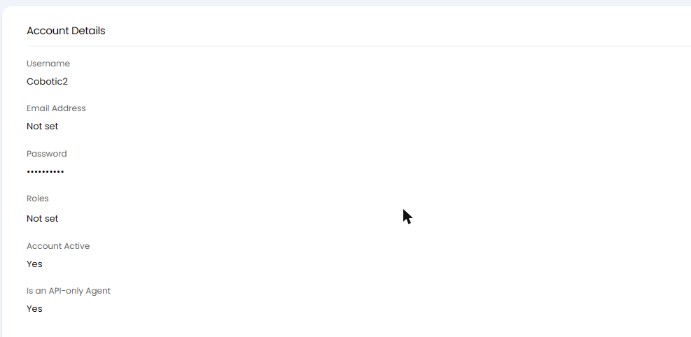
- In HaloPSA, open Configuration, then Teams and Agents, then Agents.
- Make a new agent named
Cobotic. - Tick "API-only". No extra PSA licence needed.
2. Add teams and departments
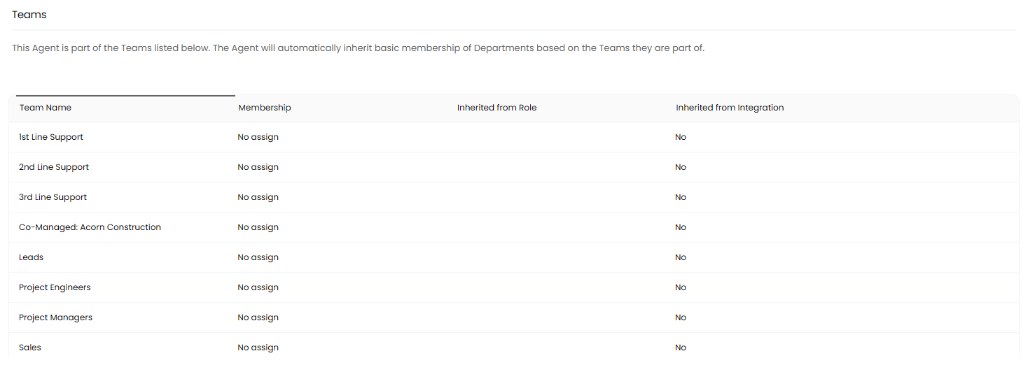
- On that agent, open Departments & Teams, then Teams.
- Add every team that works tickets. Cobotic can only read and write tickets in teams it belongs to.
- Untick "Can be assigned to", so no ticket gets assigned to Cobotic.
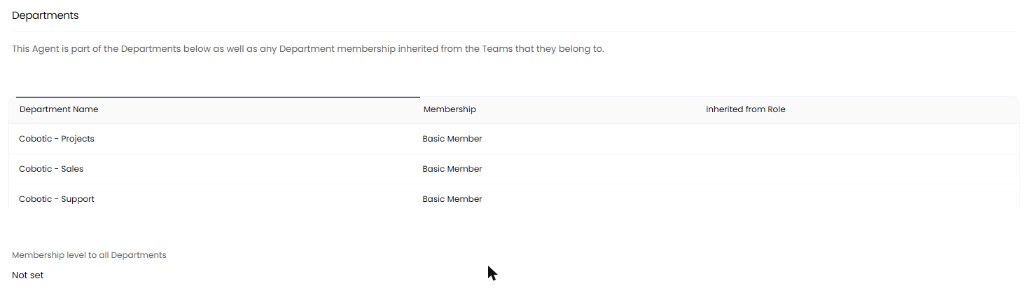
- Under Departments, add each department as a Basic Member.
3. Set Feature Access
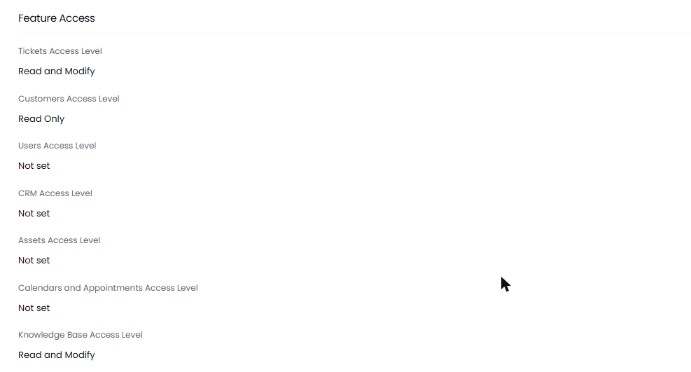
On that agent, open Permissions, then Feature Access. Set:
- Tickets: Read and Modify
- Customers: Read Only
- Users: Read Only
- Knowledge Base: Read and Modify
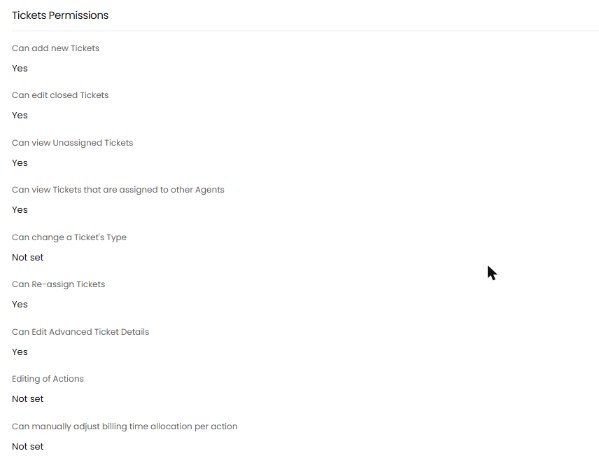
4. Set Tickets Permissions
Under Tickets Permissions, set these to Yes:
- Can add new Tickets
- Can edit closed Tickets
- Can view Unassigned Tickets
- Can view Tickets that are assigned to other Agents
- Can Edit Tickets Which Are Not Assigned To Them
- Can Re-assign Tickets
- Can assign to Agents in Teams the Agent is not a member of
- Can Edit Advanced Ticket Details
- Can always update Ticket Statuses and re-assign Tickets outside of actions
Save.
5. Create the API connection
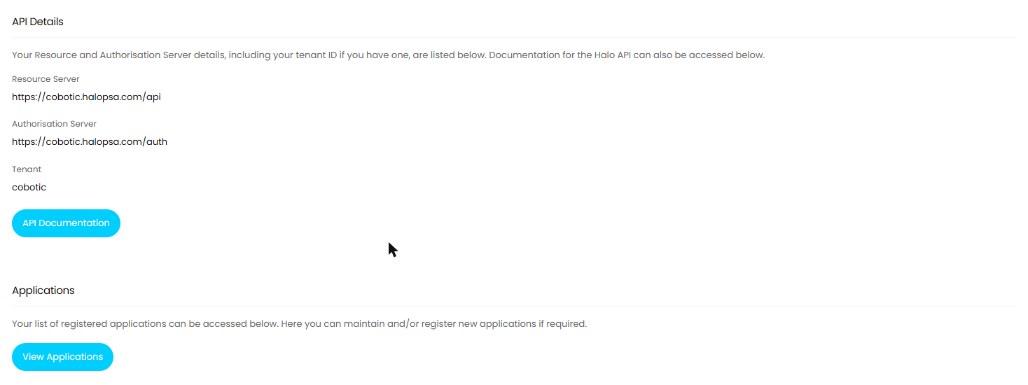
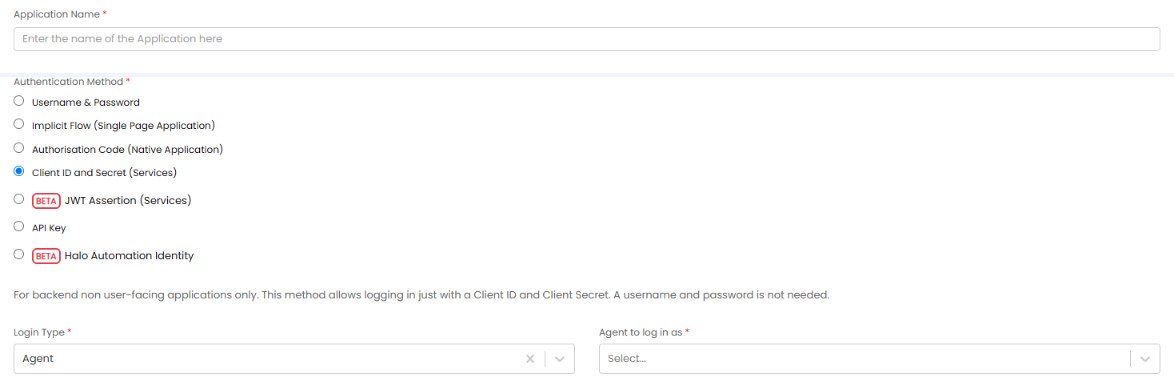
- Open Configuration, Integrations, Halo API, View Applications, New.
- Name it
Cobotic. - Set the Authentication Method to Client ID and Secret (Services).
- Set Login Type to Agent, and set Agent to log in as to the Cobotic agent.
6. Set its permissions and copy the secret
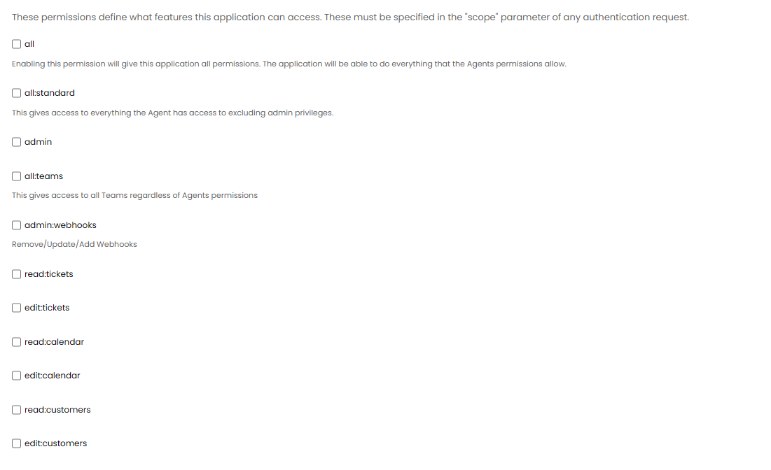
Under Permissions, tick:
read:ticketsedit:ticketsread:customersread:kbedit:kbadmin:webhooks
Copy the Client Secret before you save. Halo hides it after you save.
Save. If you missed it, edit the application and generate a new secret.
7. Paste the details into Cobotic
In your Cobotic setup, paste your Halo address, the Client ID and the Client Secret, then test the connection. Cobotic creates its webhooks for you and tests itself on 50 past tickets before it goes live.